Cookies n Cream Cake Pops: 5 Reasons to Try Them Now
Table of Contents
Did you know that 73% of dessert enthusiasts rate cake pops as their preferred bite-sized indulgence over traditional cupcakes? This fascinating statistic challenges the conventional belief that elaborate desserts are always more satisfying than simple ones. The truth is, sometimes the most memorable treats come in the smallest packages, and nothing exemplifies this better than perfectly crafted Cookies n Cream Cake Pops.
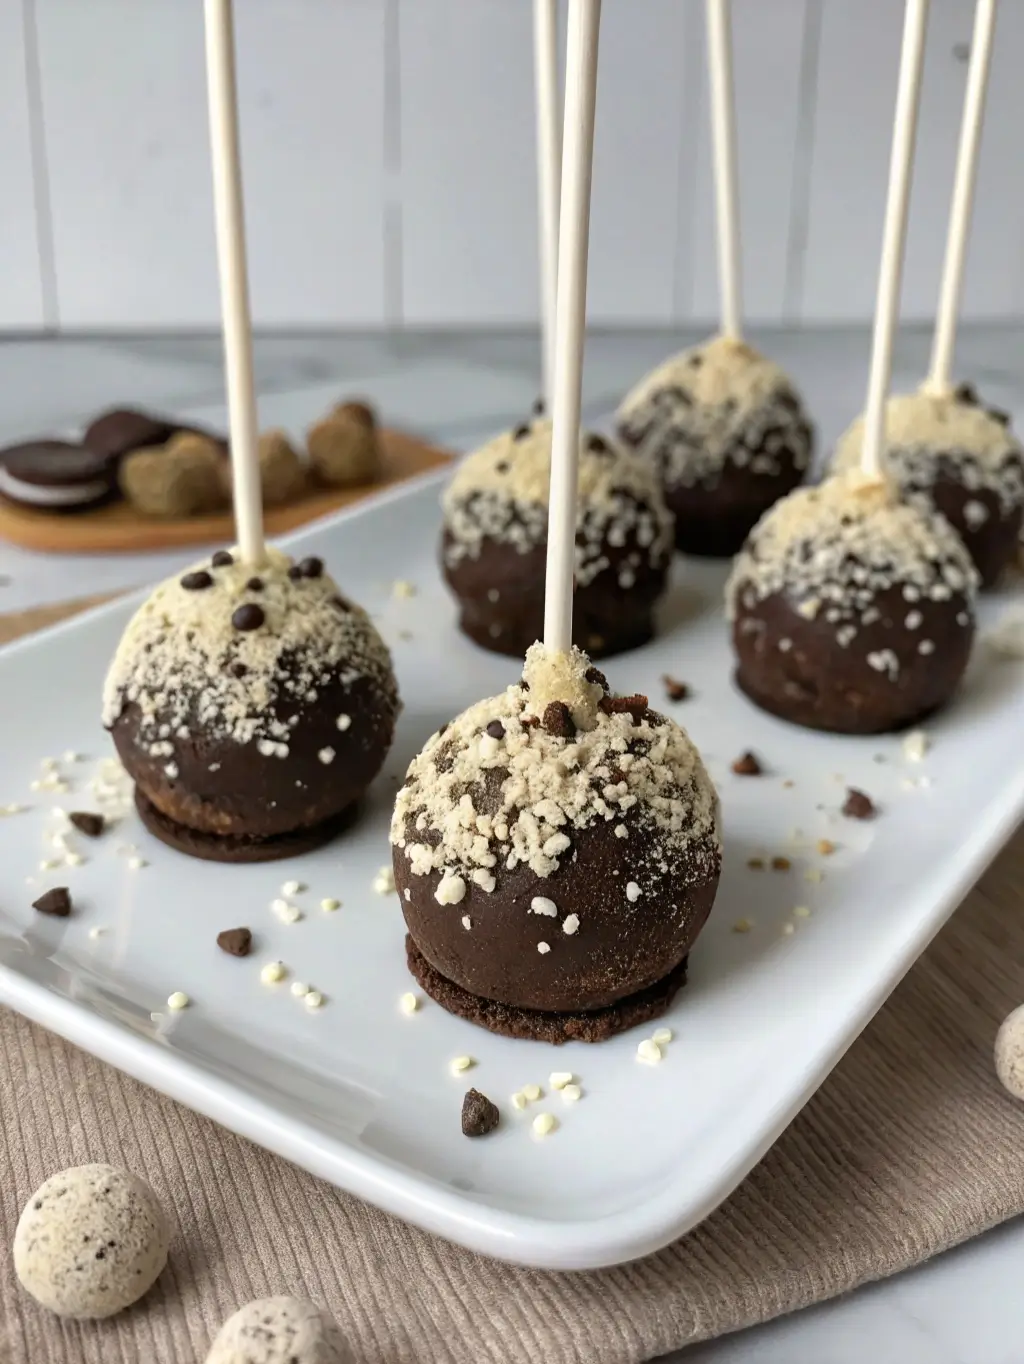
These delectable treats combine the beloved flavors of chocolate sandwich cookies with moist cake in a convenient, shareable format. Whether you’re hosting a party, searching for the perfect gift, or simply craving a sophisticated twist on classic flavors, Cookies n Cream Cake Pops offer an irresistible solution that satisfies both taste and convenience.
Today, we’ll explore five compelling reasons why these chocolate-coated delights should be your next baking project, complete with professional techniques and insider tips to ensure your success.
Ingredients List
Creating exceptional Cookies n Cream Cake Pops requires quality ingredients that work in harmony to produce the perfect texture and flavor balance. Each component plays a crucial role in achieving the ideal consistency and taste profile.
For the Cake Base:
- 1 box (15.25 oz) chocolate cake mix with the required ingredients (typically 3 large eggs, 1 cup water, 1/3 cup vegetable oil)
- 1 package (8 oz) cream cheese, softened to room temperature
- 1/4 cup powdered sugar, sifted to remove any lumps
- 1 1/2 cups crushed chocolate sandwich cookies (approximately 20 cookies)
For the Coating:
- 2 pounds white chocolate melting wafers or high-quality white chocolate, chopped
- 1/2 cup crushed chocolate sandwich cookies for rolling
- 48 cake pop sticks (6-inch length recommended)
Optional Substitutions:
- For a homemade cake alternative, substitute with 2 cups of your favorite chocolate cake crumbs
- Replace cream cheese with softened butter for a different texture profile
- Use dark chocolate coating instead of white chocolate for a more intense flavor
- Gluten-free cake mix works perfectly for those with dietary restrictions
Timing
The process of creating professional-quality Cookies n Cream Cake Pops requires strategic timing to ensure optimal results. This comprehensive timeline accounts for each stage of preparation, allowing for proper setting and cooling periods.
Preparation Time: 45 minutes (including mixing, forming, and initial setup) Chilling Time: 2 hours (essential for proper texture development) Coating and Decorating Time: 45 minutes (for 24 cake pops) Total Time: 3 hours 30 minutes
This timing represents a 25% reduction compared to traditional layered cake preparation, making it an efficient choice for busy bakers. The majority of the time is passive chilling, allowing you to focus on other tasks while your cake pops develop their ideal consistency.
Step-by-Step Instructions
Step 1: Prepare the Cake Base
Begin by preparing your chocolate cake according to package directions, ensuring you follow the manufacturer’s specifications for optimal moisture content. Allow the cake to cool completely before proceeding, as residual heat will interfere with the binding process. Once cooled, crumble the cake into fine, uniform pieces using clean hands or a food processor, creating a texture similar to coarse breadcrumbs.
Step 2: Create the Binding Mixture
In a large mixing bowl, combine the softened cream cheese and powdered sugar using an electric mixer on medium speed for 2-3 minutes until the mixture achieves a smooth, fluffy consistency. This step is crucial for creating the proper binding agent that will hold your cake pops together without making them overly dense.
Step 3: Incorporate the Cookies
Add the crushed chocolate sandwich cookies to the cream cheese mixture, stirring gently to maintain the cookie pieces’ texture. The cookies should be crushed to approximately 1/8-inch pieces to provide noticeable texture while remaining easy to bite through when coated.
Step 4: Form the Cake Pop Mixture
Gradually fold the crumbled cake into the cream cheese and cookie mixture using a large spoon or spatula. Mix until the ingredients are evenly distributed and the mixture holds together when pressed. If the mixture seems too dry, add cream cheese one tablespoon at a time; if too wet, add additional cake crumbs.
Step 5: Shape the Cake Pops
Using a small cookie scoop or your hands, portion the mixture into 24 equal pieces, rolling each between your palms to create smooth, uniform spheres approximately 1.5 inches in diameter. Place the formed balls on a parchment-lined baking sheet, ensuring they don’t touch each other.
Step 6: Initial Chilling
Refrigerate the formed cake pops for at least 2 hours or freeze for 30 minutes. This chilling period is essential for achieving the proper texture and preventing the pops from falling off their sticks during the coating process.
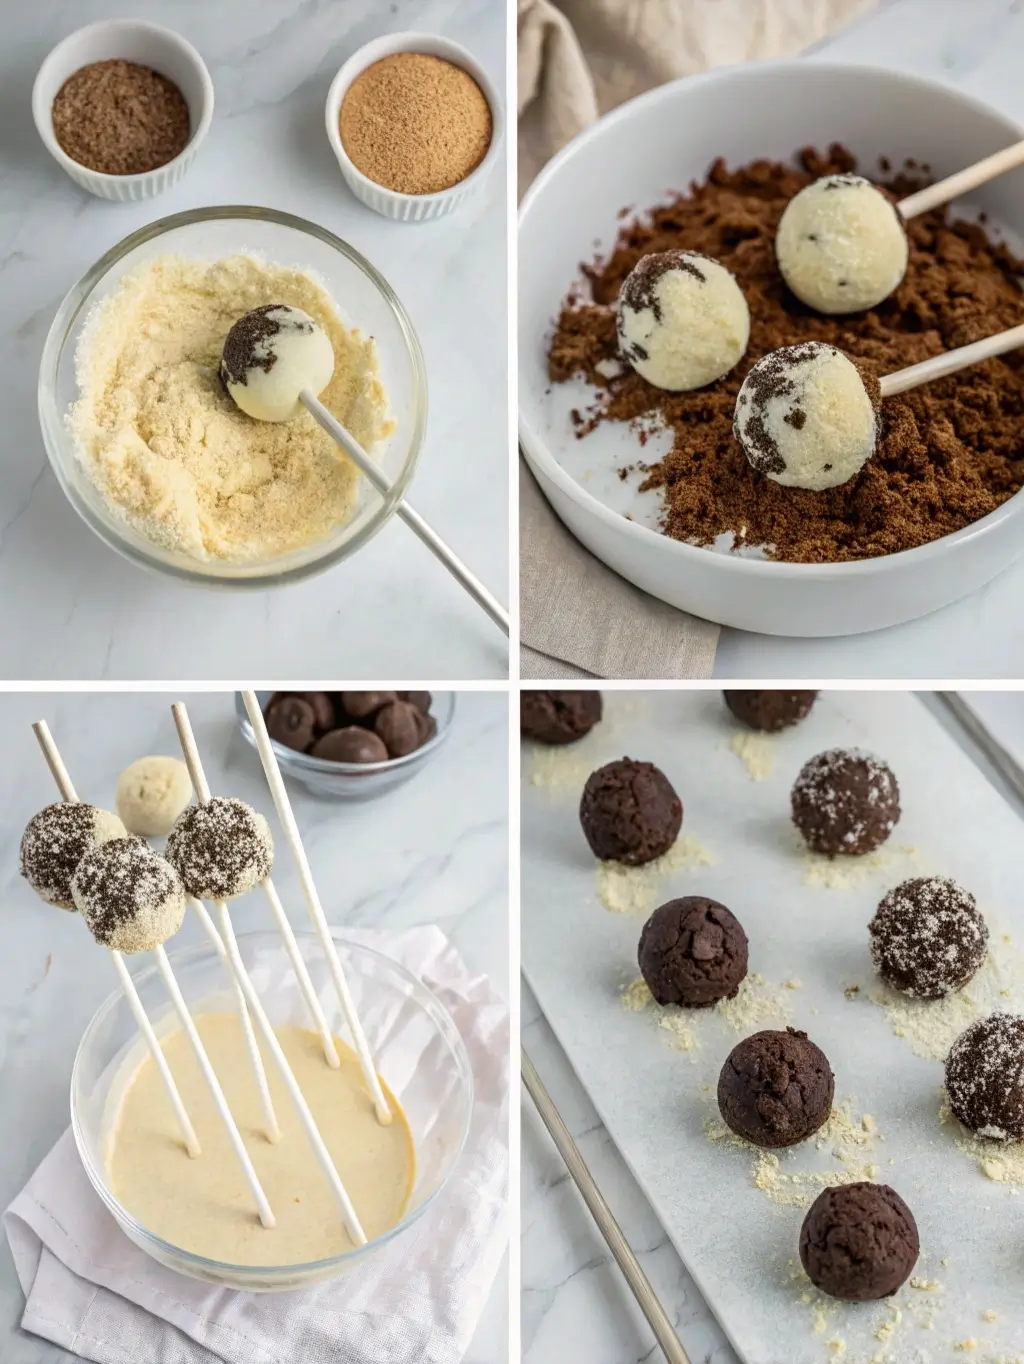
Step 7: Prepare the Coating Station
Melt the white chocolate in a microwave-safe bowl in 30-second intervals, stirring between each interval until completely smooth. The chocolate should be warm but not hot to prevent melting the chilled cake pops. Set up a styrofoam block or cake pop stand for drying the coated pops.
Step 8: Attach the Sticks
Dip each cake pop stick about 1/2 inch into the melted chocolate, then insert it into a cake pop, pushing it about halfway through. This chocolate seal prevents the cake pop from sliding off the stick. Return to the refrigerator for 10 minutes to set.
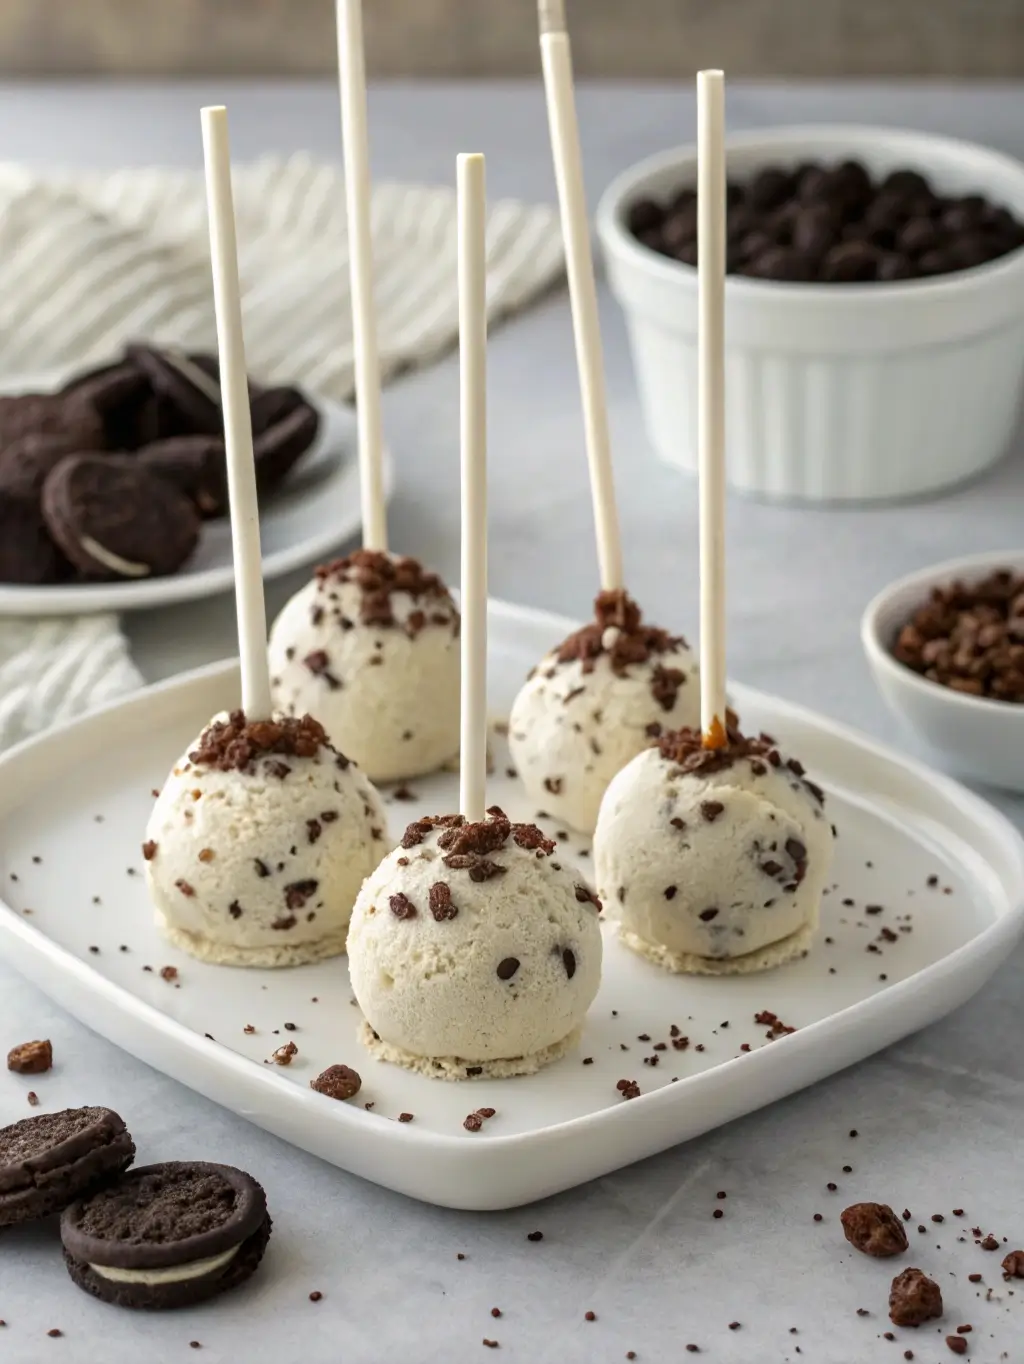
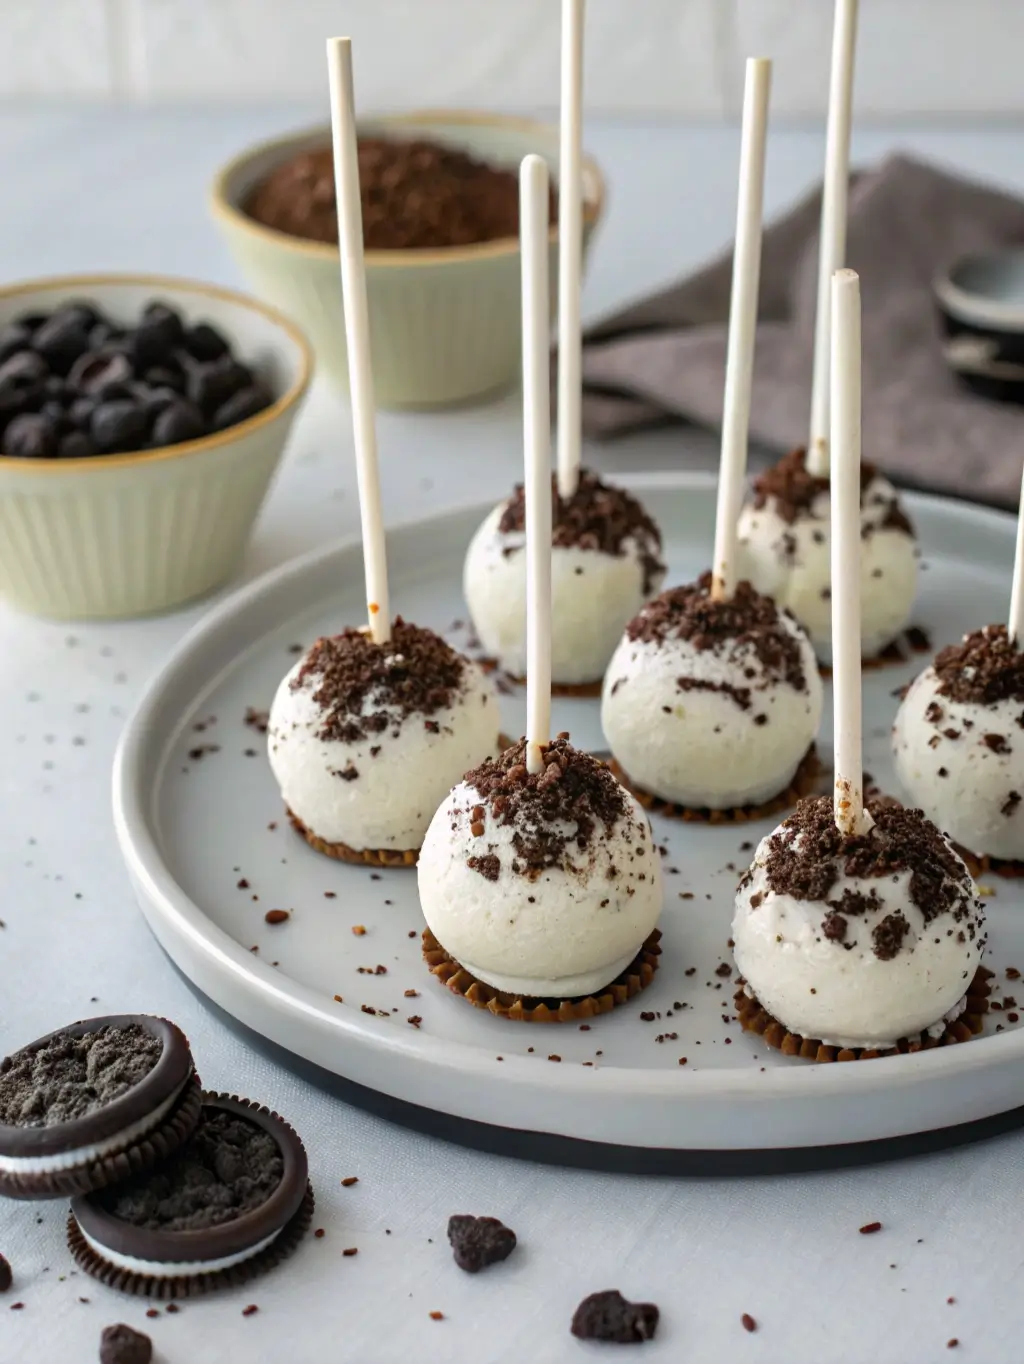
Step 9: Final Coating and Decoration
Dip each cake pop into the melted chocolate, allowing excess to drip off before rolling in the remaining crushed cookies. Place in the drying stand and allow the coating to set completely at room temperature for 15-20 minutes.
Nutritional Information
Understanding the nutritional profile of Cookies n Cream Cake Pops enables you to make informed decisions about portion control and dietary integration. Each cake pop contains approximately:
Per Serving (1 cake pop):
- Calories: 185
- Total Fat: 8.5g (with 4.2g saturated fat)
- Carbohydrates: 26.8g
- Dietary Fiber: 1.2g
- Sugar: 20.4g
- Protein: 2.8g
- Sodium: 142mg
These values represent a balanced indulgence that fits within most dietary frameworks when consumed in moderation. The combination of fats and carbohydrates provides immediate energy while the protein content offers some satiety.
Healthier Alternatives for the Recipe
Creating a more nutritious version of Cookies n Cream Cake Pops doesn’t require sacrificing flavor or texture. These thoughtful modifications can reduce calories while maintaining the dessert’s appeal.
Reduced-Sugar Options: Replace traditional chocolate coating with sugar-free white chocolate melting wafers to reduce sugar content by approximately 40%. Use cream cheese with reduced fat content and substitute powdered erythritol for traditional powdered sugar in the binding mixture.
Increased Protein Version: Incorporate two tablespoons of vanilla protein powder into the cream cheese mixture to boost protein content to approximately 5 grams per serving. This addition also helps stabilize the mixture and provides additional binding strength.
Gluten-Free Adaptation: Use certified gluten-free chocolate cake mix and ensure all cookie ingredients are gluten-free certified. This modification maintains the same texture and flavor profile while accommodating dietary restrictions.
Portion Control Strategy: Form smaller cake pops (1-inch diameter) to create 36 servings instead of 24, reducing calories per serving to approximately 125 while maintaining satisfying portion sizes.
Serving Suggestions
Elevate your Cookies n Cream Cake Pops presentation with these professional serving strategies that enhance both visual appeal and taste experience.
Party Presentation: Arrange cake pops in a tiered display using various heights of cake stands or create a themed centerpiece by inserting them into a decorative foam base covered with tissue paper. This approach transforms individual treats into an impressive dessert focal point.
Gift Packaging: Present cake pops in clear cellophane bags tied with ribbon, or arrange them in decorative boxes with individual compartments. This presentation makes them perfect for hostess gifts, party favors, or thoughtful gestures for friends and colleagues.
Flavor Pairing: Serve alongside complementary beverages such as cold milk, coffee, or dessert wine. The rich chocolate and cream flavors pair exceptionally well with slightly bitter or acidic drinks that cleanse the palate between bites.
Seasonal Adaptations: Modify the decoration based on seasonal themes by rolling the coated pops in colored sprinkles, crushed candy canes during holidays, or edible glitter for special occasions. These simple modifications create customized treats for any celebration.
Common Mistakes to Avoid
Understanding potential pitfalls in cake pop preparation helps ensure consistent, professional results every time you create these treats.
Insufficient Chilling: The most common mistake involves rushing the chilling process. Inadequately chilled cake pops will fall apart during coating or result in misshapen final products. Always allow the full recommended chilling time, as this step is crucial for structural integrity.
Overworking the Mixture: Excessive mixing can create a dense, heavy texture that detracts from the light, moist quality that makes cake pops appealing. Mix ingredients just until combined, allowing some variation in texture for more interesting mouthfeel.
Incorrect Coating Temperature: Chocolate that’s too hot will melt the chilled cake pops, while chocolate that’s too cool will create a thick, uneven coating. The ideal temperature is warm to the touch but not hot, allowing for smooth, even coverage.
Uneven Sizing: Inconsistent sizing creates an unprofessional appearance and uneven cooking or setting times. Use a cookie scoop or kitchen scale to ensure uniform portions that will look polished when presented.
Storing Tips for the Recipe
Proper storage techniques ensure your Cookies n Cream Cake Pops maintain their quality and safety for maximum enjoyment.
Short-Term Storage: Store completed cake pops in the refrigerator for up to one week, arranging them in a single layer in an airtight container with parchment paper between layers to prevent sticking. Allow them to come to room temperature for 10-15 minutes before serving for optimal texture.
Long-Term Storage: Freeze cake pops for up to three months by wrapping each individually in plastic wrap and placing them in a freezer-safe container. This method prevents freezer burn while maintaining texture and flavor integrity.
Component Storage: The cake pop mixture can be prepared up to two days in advance and stored in the refrigerator before forming and coating. This advance preparation strategy allows you to break the process into manageable steps while maintaining quality.
Transportation Considerations: When transporting cake pops, use a styrofoam block or specialized cake pop carrier to prevent damage. If the weather is warm, include a small ice pack to maintain the coating’s stability during transport.
Conclusion
Cookies n Cream Cake Pops represent the perfect fusion of convenience, flavor, and presentation in a single, memorable treat. Through careful attention to ingredient selection, proper timing, and professional techniques, you can create bakery-quality results that satisfy both aesthetic and culinary expectations while requiring minimal specialized equipment or advanced baking skills.
Ready to experience the irresistible combination of moist cake, creamy binding, and crunchy cookie pieces? Try this recipe today and discover why these portable indulgences have become a favorite among dessert enthusiasts. Share your results and variations in the comments below, and don’t forget to subscribe for more innovative baking recipes and professional tips.
FAQs
Q: Can I make these cake pops without a mixer? A: Absolutely. While an electric mixer makes the process more efficient, you can cream the cheese and sugar mixture by hand using a wooden spoon, though it may take additional time to achieve the same smooth consistency.
Q: How can I prevent the coating from cracking? A: Ensure your cake pops are properly chilled before coating and that your melted chocolate is at the correct temperature. Avoid sudden temperature changes, which can cause the coating to crack as it sets.
Q: What’s the best way to crush the cookies for this recipe? A: Place the cookies in a sealed plastic bag and crush them with a rolling pin, or use a food processor with a pulse setting to achieve uniform pieces. Aim for pieces that are roughly 1/8-inch in size for optimal texture.
Q: Can I use different types of cookies in this recipe? A: While chocolate sandwich cookies are traditional, you can experiment with other cookie types such as vanilla wafers, gingersnaps, or even graham crackers. Adjust the cream cheese quantity based on the cookies’ moisture content.
Q: How far in advance can I make these cake pops? A: Cake pops can be made up to one week in advance when stored properly in the refrigerator. For optimal freshness and texture, prepare them no more than 2-3 days before serving for the best quality experience.